Tips for taking better photos – Golden Spiral, Phi Grid, and Rules of Thirds
Continuing with tips for taking better photos, now I will discuss the Golden Ratio, Golden Spiral, Phi Grid, and the Rules of Thirds. Let’s start with the origin of the Golden Ratio.
If you don’t like math, I suggest you go straight to the Golden Spiral topic. Otherwise, here we go!
The Golden Ration, divine Ratio, or golden mean is a rectangle the human eye finds the most pleasing. The origin of this technic has some math in it. I’ll try to explain a little.
We can find the Golden Ratio by dividing a line into two, so the Ratio of the whole to the larger part equals the Ratio of the larger part to the smaller.

The Ratio will be 1/x, where:
1/x = x/(1-x)
We can rewrite it like this:

x = 0.61803 (approx..)
So, the Golden Ratio is
1/x = 1.61803…
It is an irrational number that goes forever.
The Fibonacci Sequence
As we will see, the golden Ratio is related to the famous Fibonacci sequence.
That’s the Fibonacci sequence: 1, 1, 2, 3, 5, 8, 13, 21, 34, 55, 89…
In this sequence, we add the last two numbers to find the following number, like this:
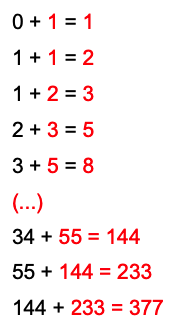
The sequence continues infinitely, and If we take the Ratio of the last result with the one before, we keep going in the direction of the Golden Ratio number.
233/144 = 1,61805556
377/233= 1,61802575
We can use it as a proportion in a rectangle 1:1.6. And if we keep adding rectangles with the same Ratio, we go towards the Golden Spiral, the divine proportion.

Painters, architects, photographers, and even musicians sometimes use the golden Ratio in their works.
People say on the internet that the Nautilus shell grows governed by the Golden Ratio. But that’s not true. It does grow beautifully like a logarithmic spiral, but not the Golden one.
On the other hand, we can find Fibonacci numbers very prevalent in Nature. If we start counting flower petals, we’re going to find them.
By clicking this link, you can learn more about the Golden Ratio and the Fibonacci Numbers with Professor Keith Devlin’s excellent Class at Stanford University.
The Golden Spiral
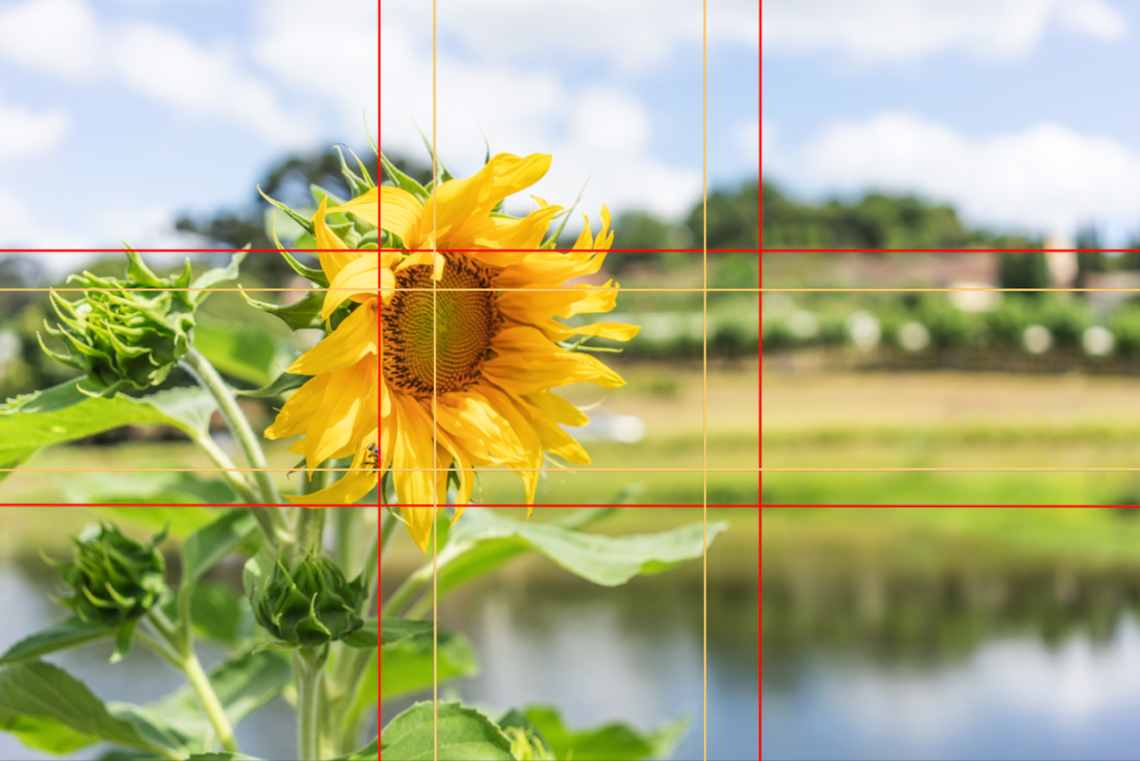
In photography, the idea of overlaying the Golden Spiral (in light gray), created by the golden Ratio, on your photo, you want to highlight the object at the intersection of those two red lines.

You can set the Golden Spiral on Lightroom Classic from Adobe by clicking the Crop Overlay and then clicking the letter “O” until the Grid of the Golden Spiral appears.
When it appears, you can change the position of the Golden Ratio by clicking “Shift + O.” Now, it is upside-down, and the read intersection of interests has changed.

By doing that, we can change the position of the Golden Spiral and the intersection point until we create the Phi Grid.
The Phi Grid
You can use the Phi Grid to know precisely the intersections points of the Golden Ratio Grid along the photo.
You can also find the Phi Grid on Lightroom Classic from Adobe by clicking the Crop Overlay and clicking the letter “O” until the Phi Grid appears.

The intersections of the lines of the Phi Grid have their origins in the Golden Spiral Intersections.
Note that the Phi Grid is much like the Rules of Thirds. Let’s talk about it a little.
The Rules of Thirds
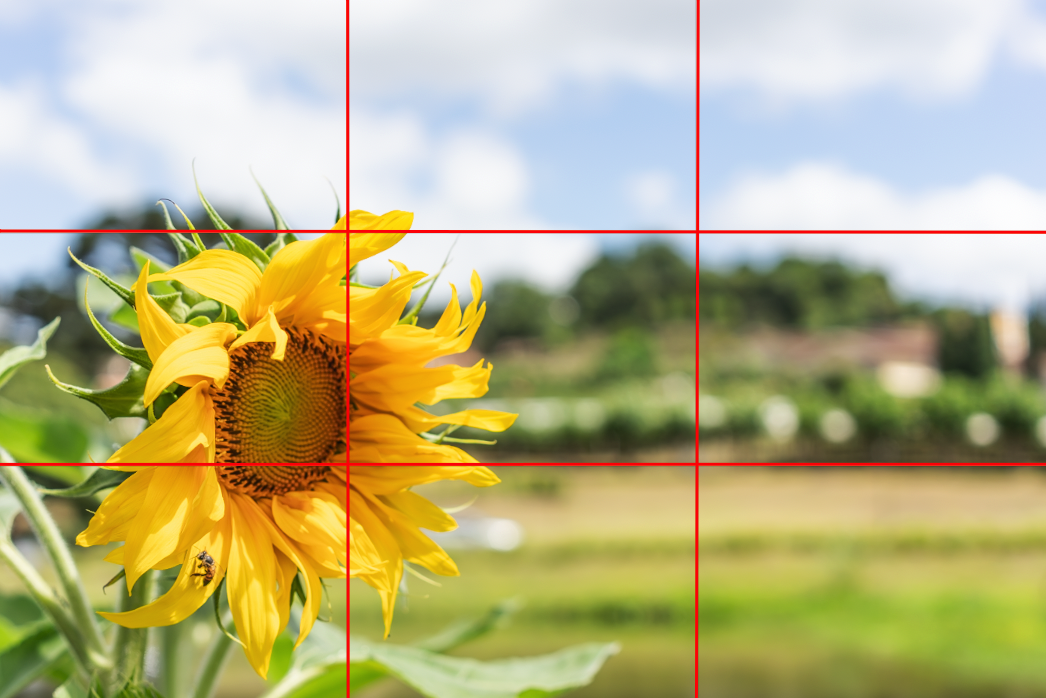
The rule of thirds is a guideline that breaks an image down into thirds, horizontally and vertically. So, you have nine pieces and four gridlines.
According to the rule, you’ll have better compositions by positioning vital elements along the gridlines. It seems that the grid lines and the intersection points call the attention of the human eyes.

The Rules of Thirds and the Phi Grid look very similar, but some people claim that the Phi Grid is a better choice because it produces a more balanced image.
While the Rules of Thirds look too obvious, the Phi grid makes the photo appear more natural, fluid, and pleasing to the eye. People say that the Phi, based on the Golden Spiral, adds dynamic and emphasizes movement in the photo.
You can easily find and use the Rules of Thirds on cellphones and Cameras to take shots. The Phi Grid is more likely to be used when editing a picture with a program like Lightroom or Photoshop from Adobe.
Note that both rules aim to create more interest than simply centering the object in the photo.
Horizon line and the Rules
The horizon line is a line that goes crossing the scene that divides the sky from the ground.
If you want to emphasize the sky, you’re going to place the horizon line in the lower line of the grid you are using, Rules of Thirds or Phi Grid. But if you want to highlight the ground, you will fix the horizon on the upper two-thirds.

If you liked the picture above, you could see more of Fernando de Noronha Archipelago by going to the Post “Top things to do and shoot at Fernando de Noronha.”
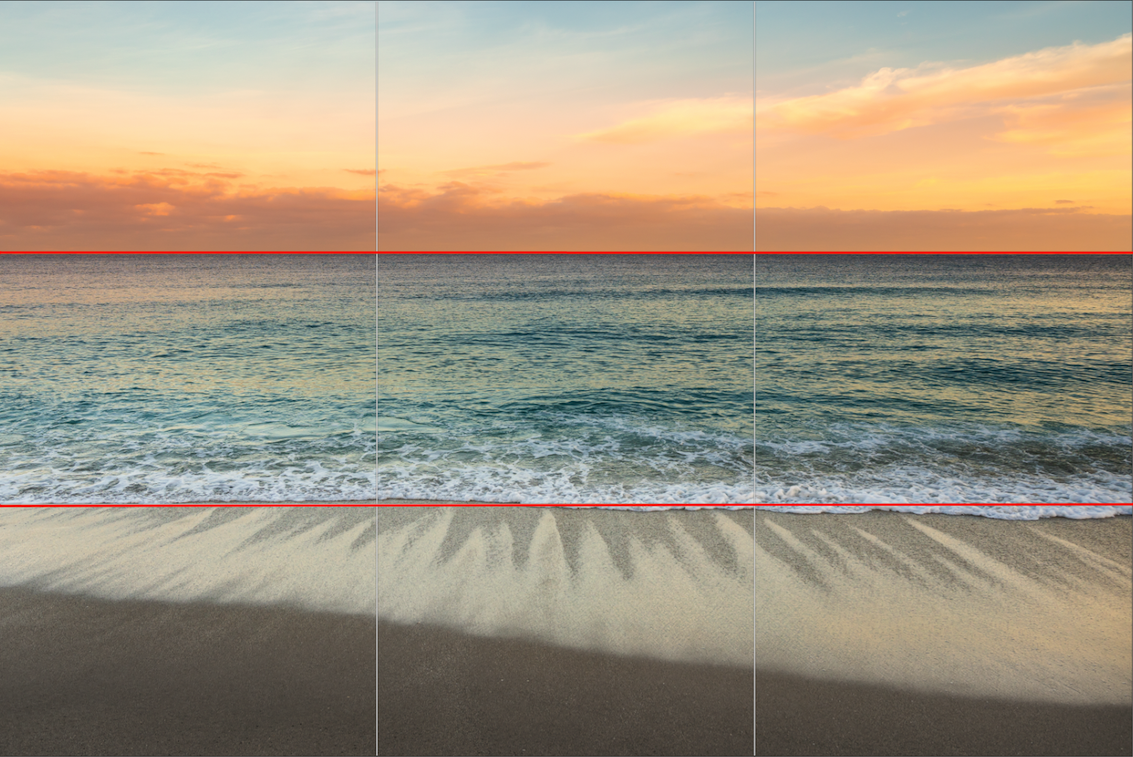
In the scene below, the horizon was set on the grid low line of the Rules of Thirds.

Notice that you can also try to create an image that uses all the lines, like this.
On the other hand, you can ignore putting the horizon on a line grid and fix it in a parallel line, like in the picture below. The horizon line was set in the middle:

Vertical lines – Where to fit the Subject – Left to Right or Right to Left
We have just talked about how to fit the horizon and better position them with the horizontal lines of the grid.
Now, we will explore the vertical lines to add some movement to the photo.
First, you must understand who your viewers are and how they are accustomed to reading.
If they are accustomed to reading from left to right, their eyes will naturally read the scene similarly. So, placing the subject of interest in the bottom right will capture better the viewer’s eye and attention.
Usually, people who read from left to right take the same path to read a photo.
The human eyes travel from left to right, from top to bottom, just like how they read. The optical path starts at the left, moves to the right, then goes down to the left again before heading back to the right. The name of that path is the Z-Pattern.
Then, if you put a subject on the left of a photo, the viewer’s eyes will naturally see it before going to the rest of the picture.
On the other hand, in countries where people read from right to left, studies show that the pattern of looking at an image is the reverse of the western eyes.

So, what do you prefer? As we saw, your answer will be directly related to your reading pattern, from left to right or vice versa. The sunflower is on the left or the right of the image.
How to Break the Rules
Sometimes the angle you shoot is more important to the picture than the concern of following those rules. To give balance to the photo, tell a story, and highlight something you think is vital to the scene. That’s how we break it.
In the picture below, we have a composition with the mirror’s reflection, and it looks good to fit the horizon line in the middle of the photo:
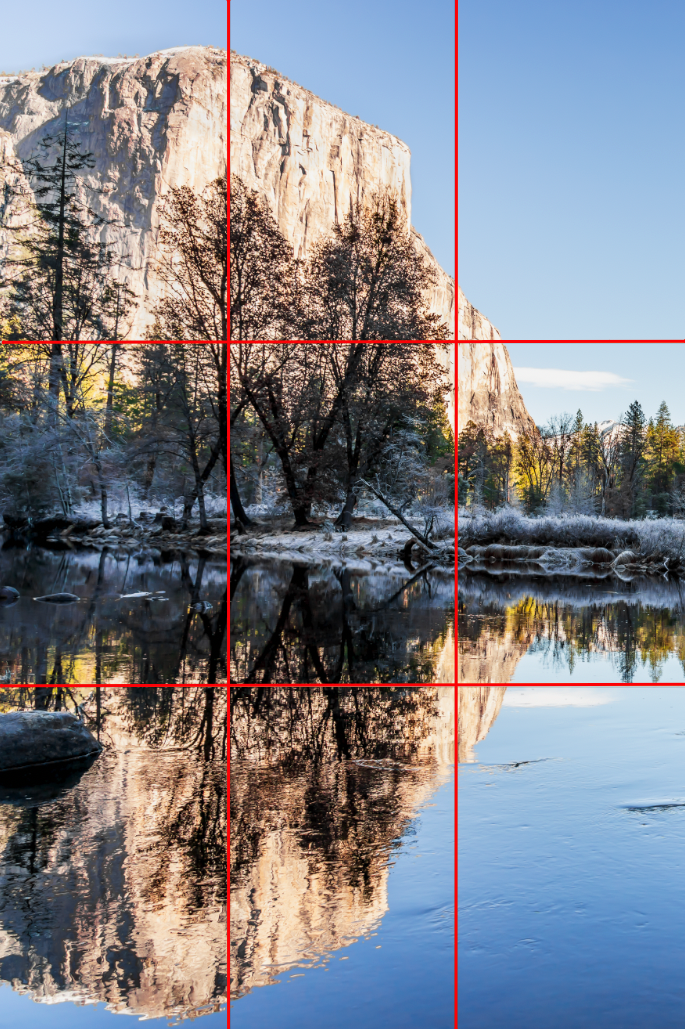
If you liked that photo and want to see more pictures of Yosemite National Park, I suggest you go to the Post “One day trip to Yosemite National Park.”
The following photo is a Skyline of Manhattan buildings. It doesn’t fit in any of these rules, but it is not bad.

Along with that, do not underestimate central composition. Trust yourself if you think you should break it in a particular case.
I think those rules tell us that we shouldn’t put everything in the middle because following them could create a more exciting photo for the human eyes.
As Pablo Picasso said, learn the rules like a pro so you can break them like an artist!


2 Comments
whoiscall
Thx!
Paula Montenegro
You’re welcome! Feel free to ask if you have any questions!